Payment Gateway | Go | Stripe | Vault
In my previous posts, I have talked about how to build your own Google NLP API. You are a smart developer and you got a great idea 💡. You build an amazing API with useful functions. The only thing you are missing is a validated business case. I think the eaiset way to prove the use case is to put it in the market and see whether or not people are willing to pay for it. Here you go! Now you need a good payment gateway. How did you build one? In this post, I will show you a simple solution built all in Go and integrated with Stripe and using HashiCorp Vault. For more information, please feel free to 👉📱message my twilio bot +447479275693. I will come back to you shortly 😃.

Let’s start with the frontend
<!--
// There are some pre-built UI elements from Stripe
// https://stripe.com/gb/payments/elements
-->

<div class="sr-main" style="width:600px; margin:20px auto;">
    <form action="/charge" method="post" id="payment-form" class="sr-payment-form">
            <div class="sr-combo-inputs-row">
            <div class="sr-input sr-card-element" id="card-element"></div>
            </div>
            <div class="sr-field-error" id="card-errors" role="alert"></div>
       <button>
            <span id="button-text">Pay</span><span id="order-amount"></span>
       </button>
            <!-- Used to display form errors. -->
        <div id="card-errors" role="alert"></div>
    </form>
</div>}
// now let's look at the javascript

// Create a Stripe client.
var stripe = Stripe('your_stripe_pub_key');

// Create an instance of Elements.
var elements = stripe.elements();

// Custom styling can be passed to options when creating an Element.
// (Note that this demo uses a wider set of styles than the guide below.)
var style = {
  base: {
    color: '#32325d',
    fontFamily: '"Helvetica Neue", Helvetica, sans-serif',
    fontSmoothing: 'antialiased',
    fontSize: '16px',
    '::placeholder': {
      color: '#aab7c4'
    }
  },
  invalid: {
    color: '#fa755a',
    iconColor: '#fa755a'
  }
};

// Create an instance of the card Element.
var card = elements.create('card', {style: style});

// Add an instance of the card Element into the `card-element` <div>.
card.mount('#card-element');

// Handle real-time validation errors from the card Element.
card.addEventListener('change', function(event) {
  var displayError = document.getElementById('card-errors');
  if (event.error) {
    displayError.textContent = event.error.message;
  } else {
    displayError.textContent = '';
  }
});


// Handle form submission.
var form = document.getElementById('payment-form');
form.addEventListener('submit', function(event) {
  event.preventDefault();

  stripe.createToken(card).then(function(result) {
    if (result.error) {
      // Inform the user if there was an error.
      var errorElement = document.getElementById('card-errors');
      errorElement.textContent = result.error.message;
    } else {
      // Send the token to your server.
      stripeTokenHandler(result.token);
    }
  });
});

// Submit the form with the token ID.
function stripeTokenHandler(token) {
  // Insert the token ID into the form so it gets submitted to the server
  var form = document.getElementById('payment-form');
  var hiddenInput = document.createElement('input');
  hiddenInput.setAttribute('type', 'hidden');
  hiddenInput.setAttribute('name', 'stripeToken');
  hiddenInput.setAttribute('value', token.id);
  form.appendChild(hiddenInput);

  // Submit the form
  form.submit();
}
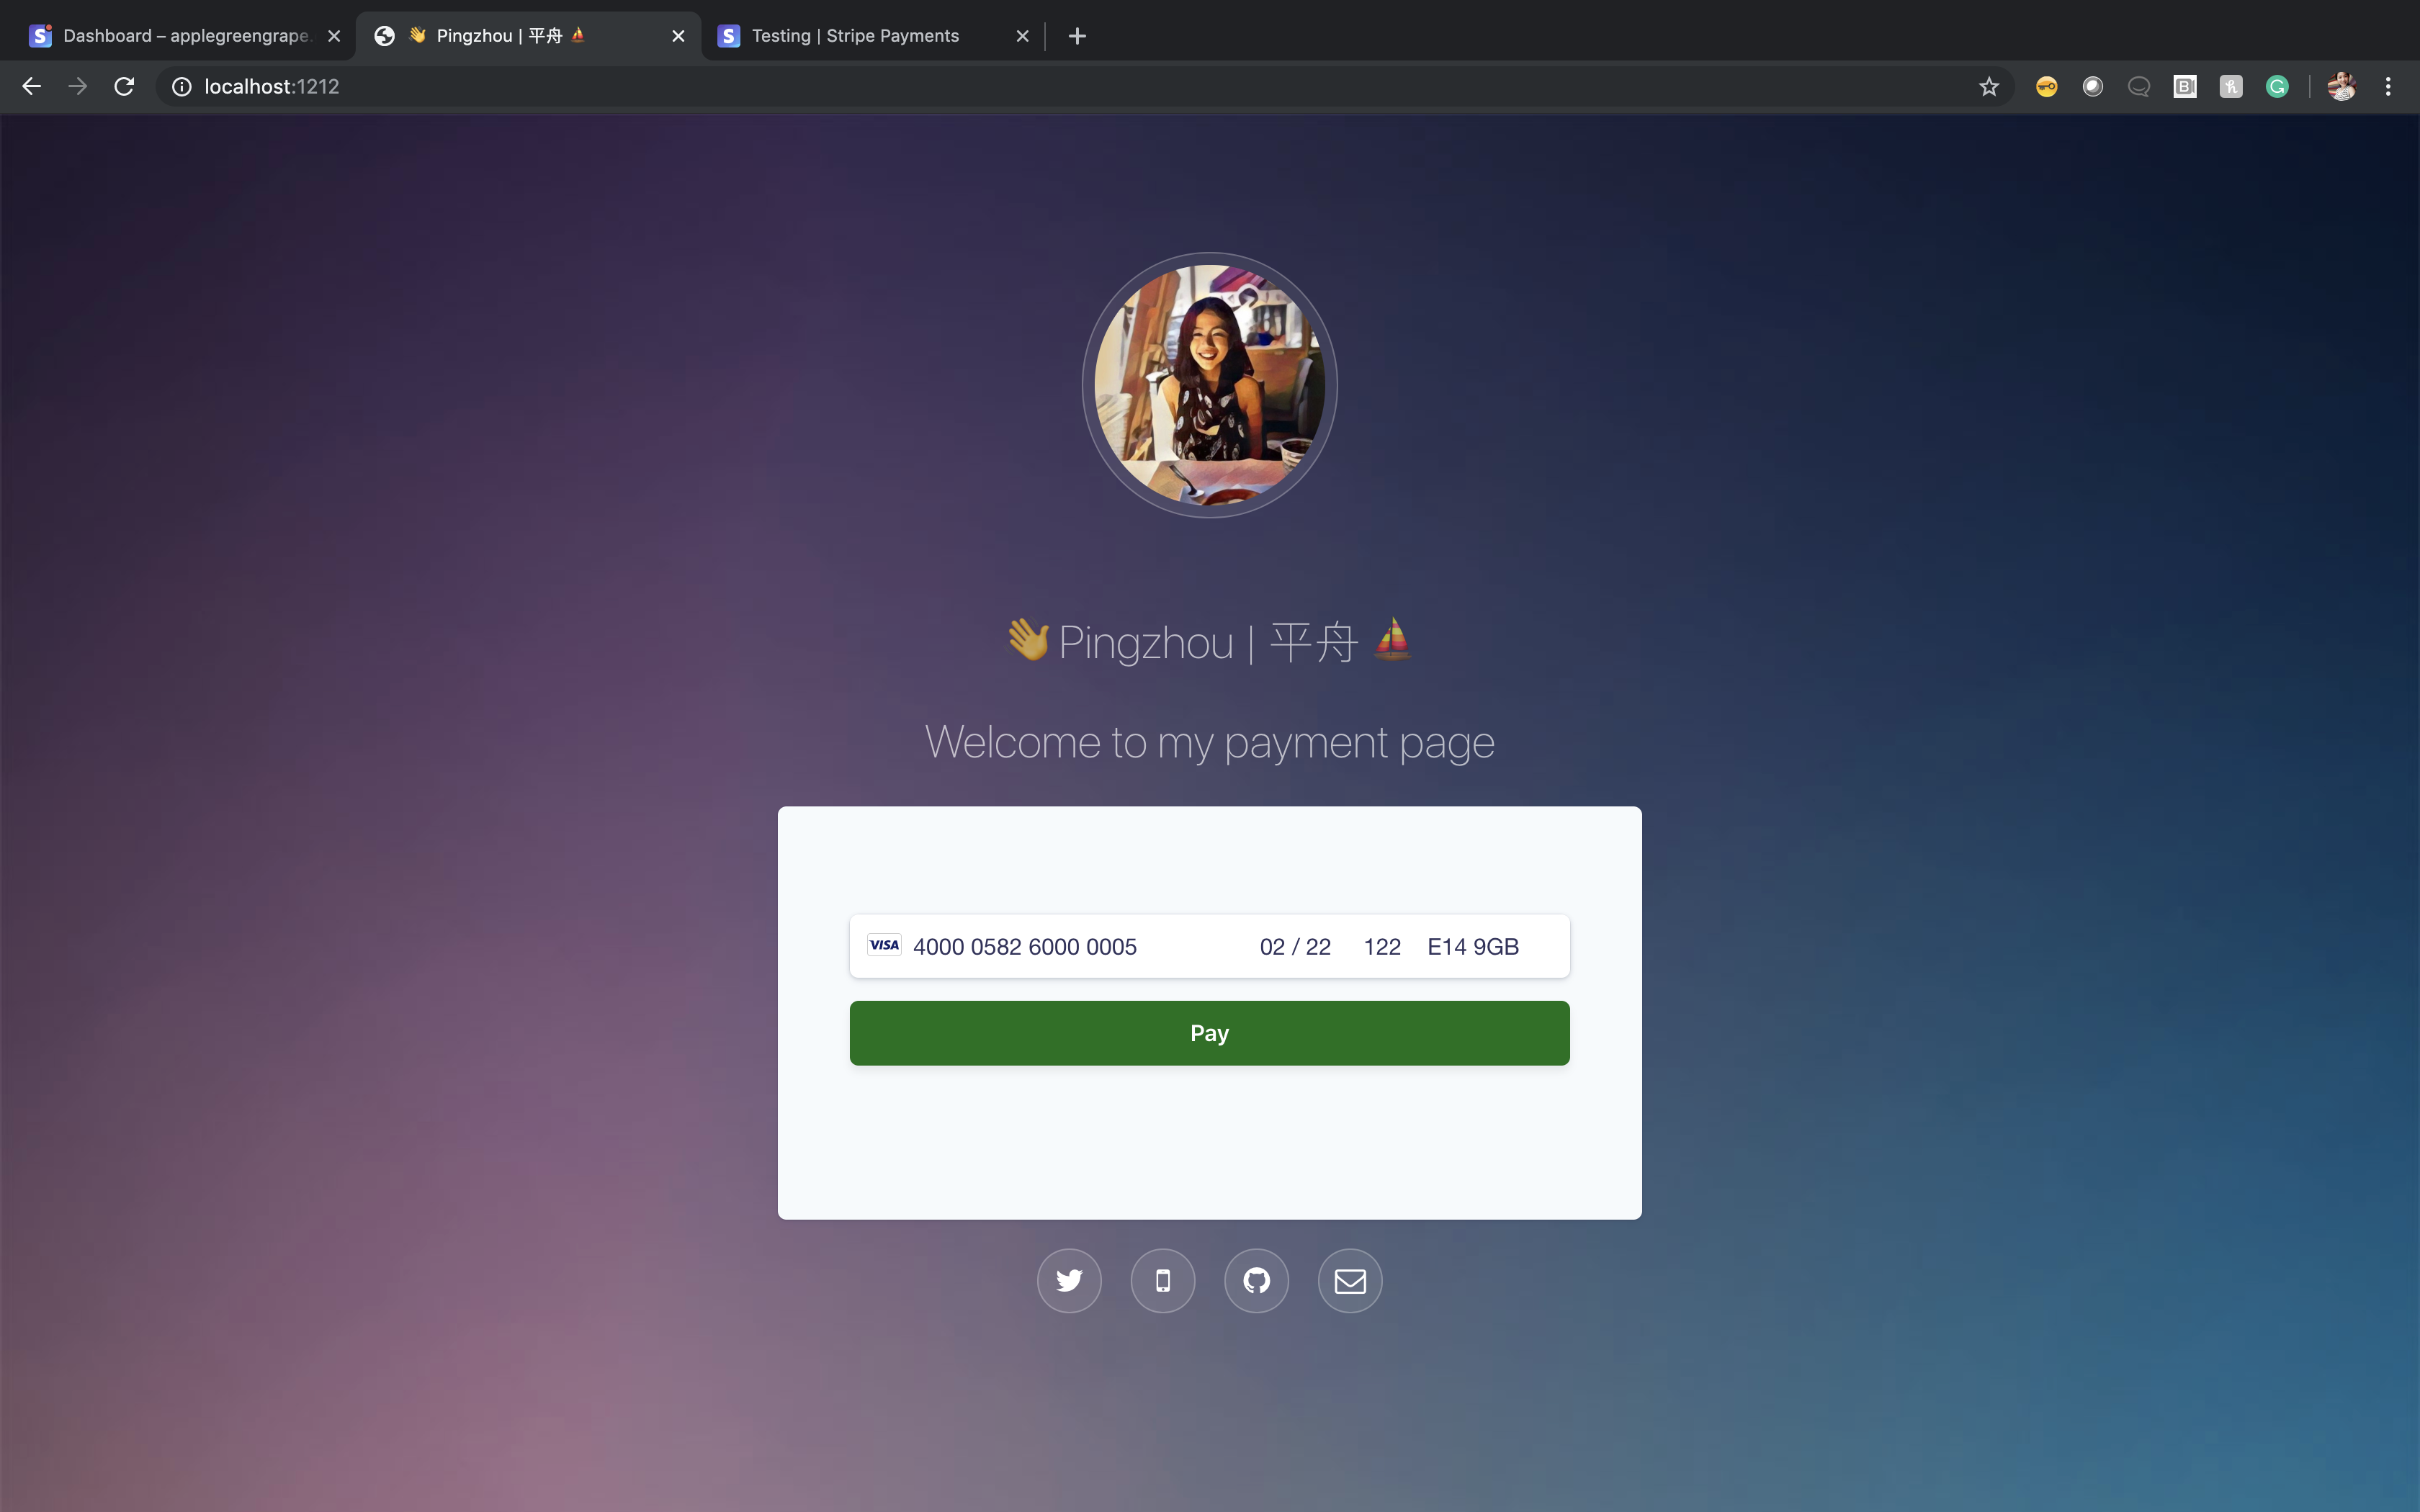
Now Let’s just make it prettier. There are quite a lot free html templates on line you can just download 😃. Here you go! Your own payment Gateway Page looks pretty good!
Now let’s look at the backend
// This quick win/demo is using stripe's charge API. It is a good way to get you started but not really the best practice
// In this demo, we are using the Vault as the backend KV storage. I like it because:
// 		1) It's a good and secured KV storage tool.
// 		2) It also manage the version for you. Everything is tracked and easy to roll back
//      3) It's easy to scale up. Just adding more nodes.
// I would recommended to use Stripe's Payment API https://stripe.com/docs/payments/payment-intents
// "We recommend creating a PaymentIntent as soon as the amount is known, such as when the customer begins the checkout process" - also recommended by the Stripe
//  "The Charges API works for U.S. and Canadian payments but will not work for the rest of the world. To accept payments from customers outside of North America, use the Payment Intents API." - also warned by Stripe


func main() {

  stripe.Key = os.Getenv("SECRET_KEY")

  http.Handle("/", http.FileServer(http.Dir("./views")))

  // using Go's html template to make a pretty after payment page

  tmpl := template.Must(template.ParseFiles("./views/after-payment-page.html"))

  http.HandleFunc("/charge", func(w http.ResponseWriter, r *http.Request) {
	token := r.FormValue("stripeToken")

	// calling the charge api

	params := &stripe.ChargeParams{
		Amount: stripe.Int64(999),
		Currency: stripe.String(string(stripe.CurrencyGBP)),
		Description: stripe.String("api A token"),
	}

  params.SetSource(token)

  // create your own token to track cutsomers
  id, err := uuid.NewRandom()
  if err != nil{
    // err handling for generateing uuid
  }

	ch, err := charge.New(params)
	if err != nil {
    // payment failed with error
    pageData := tok{
      Status: "😿Payment Failed 😿, reference id is here 👇",
      Tok: id,
    }
    tmpl.Execute(w, pageData)
    body := Data{
      User: id.String(),
      Status : "😿Payment Failed 😿",
      Ref : ch.ID,
    }

    payloadData := Vault{
      Data: body,
    }

	// In this demo, we are using the Vault
    callVault(payloadData, id.String())

  }

  fmt.Println(ch)
  // payment went through without error
  pageData := tok{
    Status: "🎉 Payment Completed 🎉, your token is here 👇",
    Tok: id,
  }

  tmpl.Execute(w, pageData)

  body := Data{
    User: id.String(),
    Status : "🎉 Payment Completed 🎉",
    Ref : ch.ID,
}

payloadData := Vault{
  Data: body,
}

callVault(payloadData, id.String())

})

  http.ListenAndServe(":1212", nil)

}
Now you can just easily to POST the customer data to your Vault.
func callVault(payload Vault,  id string){

  body, _ := json.Marshal(payload)

  var b = []byte(string(body))

  url := "http://127.0.0.1:8080/v1/secret/data/"+id

  req, err := http.NewRequest("POST", url, bytes.NewBuffer(b))
  if err != nil {
  // handle err
  fmt.Println(err)
  }
  req.Header.Set("X-Vault-Token", os.Getenv("VAULT_TOKEN"))
  req.Header.Set("Content-Type", "application/x-www-form-urlencoded")

  resp, err := http.DefaultClient.Do(req)
  if err != nil {
	  fmt.Println(err)
  }
  defer resp.Body.Close()
}
If the payment go through, your customer will get a payment complete page. Like this 👇:

If the payment went wrong, your customer will get a payment failed page. Like this 👇:

And you have all the records in your Vault KV:
/ # vault kv list secret
Keys
----
8ed9e686-296b-484a-8371-c0169f05c72f
993bcc1a-2d1a-4bb9-95b4-129652bd3f5a
/ # vault kv get secret/8ed9e686-296b-484a-8371-c0169f05c72f
====== Metadata ======
Key              Value
---              -----
created_time     2019-12-04T10:37:56.352085651Z
deletion_time    n/a
destroyed        false
version          1
===== Data =====
Key       Value
---       -----
ref       n/a
status    😿Payment Failed 😿
user      8ed9e686-296b-484a-8371-c0169f05c72f
/ # vault kv get secret/993bcc1a-2d1a-4bb9-95b4-129652bd3f5a
====== Metadata ======
Key              Value
---              -----
created_time     2019-12-04T10:37:38.115146197Z
deletion_time    n/a
destroyed        false
version          1
===== Data =====
Key       Value
---       -----
ref       ch_1FlvEjA9LWTzlLdFgGznKqiK
status    🎉 Payment Completed 🎉
user      993bcc1a-2d1a-4bb9-95b4-129652bd3f5a

Please feel free to leave some comments if you have any questions or any other interesting use cases. If you have enjoyed reading this post, please feel free to buy me a (r'virtual|physical', 'coffee').